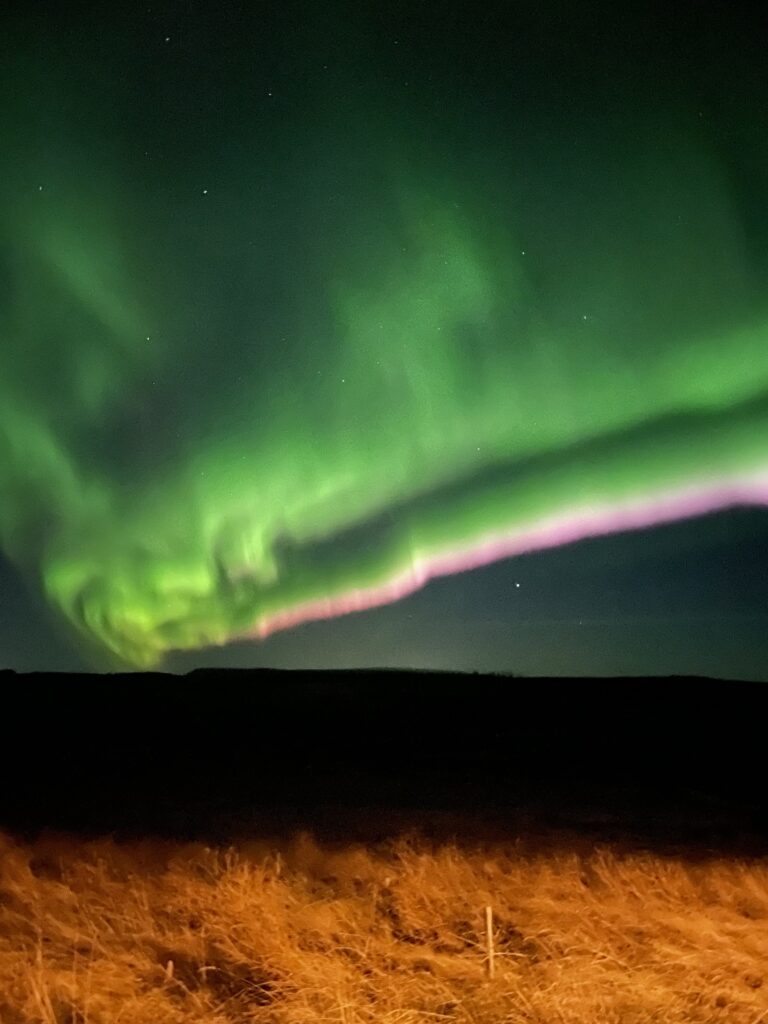
The allure of the Northern Lights, or Aurora Borealis, is undeniable. Those mesmerising ribbons of green, pink, and purple dancing across the night sky are a photographer’s dream. While professional DSLR cameras are often used to capture the full grandeur of this celestial spectacle, you might be surprised to learn that your trusty iPhone can also do the job remarkably well. In this Northern Lights iPhone Photography guide, we’ll explore how to capture the Northern Lights using your iPhone and turn your smartphone into a tool for stunning aurora photography. If you are interested in shooting with a camera please check out out guide here.

1. Plan Your Adventure
The first step in capturing the Northern Lights on your iPhone is to plan your adventure. Research the best times and locations for viewing the auroras.
To find Northern Lights you can either:
- Walk somewhere: If you are staying in the countryside you do not need to go far, just away from the lights of buildings. If you are in Reykjavik head to the shore or Grotta Lighthouse.
- Book a tour: An expert guide can take you to the best location and take all the planning stress away from you, tell you stories about the Northern Lights and Iceland, given you photography advise tailored to the conditions of the night and even get some good photos of you. You can even sleep on your way home.
- Rent a car to explore yourself: Check the weather forecast and the road conditions and head out. If you can find somewhere that had a great backdrop for photos like lakes, mountains, waterfalls, churches or lighthouses. Head to Kleifarvatn Lake on the Reykjanes peninsula, Thingvellir National Park or the Snaefellsnes peninsula for some perfect locations.
2. Choose the Right Time
The Northern Lights are typically most active during the late evening and early morning hours. Check Aurora forecasts to determine the best time to head out for a chance to witness this natural wonder.
To find the best time and location for activity on your trip check weather conditions, cloud coverage and Aurora activity on the Icelandic Met Office Website, also on the website Auroraforecast.is and on the app My Aurora Forecast & Alerts, which also send you a notification when activity is high.
3. Prepare Your iPhone
Before you head out, make sure your iPhone is ready for aurora photography:
- Storage: Ensure you have enough free space on your iPhone to capture photos and videos. The Northern Lights can be unpredictable, and you’ll want to take plenty of shots.
- Battery: Fully charge your iPhone and consider bringing a portable charger to keep it powered throughout the night.
- Apps: Download relevant apps like night mode or long-exposure camera apps to enhance your iPhone’s capabilities.
4. The Shot
While newer iPhone models have improved automatic low-light capabilities, for capturing the Northern Lights you could still benefits from adjusting the settings manually.
Night Mode
In low-light conditions, your iPhone’s Night Mode will automatically activate, indicated by the Night Mode icon appearing in the top left corner of your phone. This ingenious feature extends the camera sensor’s exposure time, allowing more light to be captured and thus enhancing the detail in your images – a technique known in photography as long exposure. By default, Night Mode adjusts the exposure time between 1 and 3 seconds based on ambient light levels. However, when it comes to capturing the elusive beauty of the Northern Lights, we require a longer exposure time. To achieve this, we must delve into the hidden settings menu within the iPhone’s camera app. Simply tap the top arrow to reveal the menu, locate the Night Mode icon, and select it. A slider will then appear, granting you the ability to adjust the exposure time. Slide it all the way to the right to maximize the exposure, ensuring you capture every intricate detail of the auroras dancing across the Icelandic sky.
In the quest for the perfect shot of the Northern Lights, understanding how to optimise your iPhone’s Night Mode settings is crucial. Once you’ve adjusted the exposure time slider to the maximum value, it’s essential to note that this value can vary depending on factors such as movement and stability. When the iPhone detects movement, such as a shaky hand, the maximum exposure value will represent 10 seconds. However, if you’re using a tripod to stabilize your device, the maximum exposure value extends to a whopping 30 seconds – ideal for capturing the intricate beauty of the Aurora Borealis in all its glory. While you may still be able to capture something at 10 seconds, the quality of the image will pale in comparison to the 30-second exposure. For the crispest, most detailed photos of the Northern Lights, aim for the 30-second Night Mode setting. Keep in mind that when luck is on your side and the auroras are exceptionally bright, the Night Mode maximum value may drop slightly, usually to around 27 or 22 seconds. Additionally, even when using a tripod, it’s crucial to select the right location to set it down. Placing the tripod on the hood of a car with the engine running may introduce vibrations, causing the iPhone to revert to a 10-second exposure. Similarly, on windy nights, achieving a full 30-second exposure may prove challenging. By understanding and optimizing these settings, you’ll be well-equipped to capture breathtaking images of the Northern Lights and preserve the magic of your Icelandic adventure for years to come.
Exposure
When capturing photos in certain lighting conditions, such as the bright winter landscape blanketed in snow, you may encounter a need to adjust exposure. While Night Mode excels in enhancing low-light scenarios by extending exposure, it may inadvertently lead to overexposure in exceptionally bright environments. To counteract this, we turn to Exposure Adjustment – a setting that ensures no details are lost in areas flooded with light. Accessing this feature involves navigating to the hidden settings menu, which can be revealed by tapping the top arrow within the camera app. Look for the icon adorned with a + and – enclosed within a circle, indicating Exposure Adjustment. Here, you can fine-tune the exposure by adjusting it to a negative value. Keep in mind that there’s no one-size-fits-all value for Exposure Adjustment; it’s a matter of trial and error to find the perfect balance for your surroundings. Start by experimenting with values such as -0.7 to gauge their impact on your photos. Additionally, it’s prudent to decide whether to preserve specific camera settings, such as Exposure Adjustment and Night Mode. You can manage this in your iPhone’s settings under Camera > Preserve Settings. Personally, I opt to preserve Night Mode settings, as it automatically deactivates in ample light conditions, ensuring optimal performance. However, I prefer not to preserve Exposure Adjustment settings, as I vary its usage and intensity depending on the situation. By remaining vigilant and customizing these settings to suit your preferences, you can harness the full potential of your iPhone’s camera and elevate your photography game to new heights.
5. Stabilise Your iPhone
Capturing the Northern Lights often requires long exposure times, which can lead to blurry photos if your iPhone is not stabilised. Use a tripod or any stable surface to keep your phone steady- rocks are great!
6. Be Patient and Experiment
The Northern Lights can be elusive, so be patient and keep experimenting with your iPhone settings. Take multiple shots with different exposures and compositions. Don’t be afraid to get creative with your angles and framing.
7. Edit Your Photos
After your aurora adventure, you can enhance your Northern Lights photos further by using editing apps. Adjust brightness, contrast, and colour balance to bring out the vividness of the auroras. There are plenty of user-friendly photo editing apps available on the App Store.
8. What iPhone do I Need?
When it comes to capturing the ethereal beauty of the Northern Lights with your iPhone, the model you choose matters more than you might think. While any iPhone from the 11 series onwards boasts the coveted Night mode feature essential for photographing the auroras, the quality of your shots can vary significantly depending on the model. Contrary to popular belief, Apple’s incremental improvements to camera technology between models do make a noticeable difference, as evidenced by our firsthand experiences shooting the Aurora with iPhone 11 Pro, 12 Pro, and 13 Pro. The images captured with the iPhone 13 Pro exhibit a level of clarity and detail that surpasses its predecessors, allowing for stunning shots of not only the Northern Lights, but also celestial wonders like the Milky Way. In fact, with the iPhone 13 Pro, we’ve even managed to capture mesmerizing videos of the Northern Lights, a feat that proved challenging with the iPhone 12 Pro. So, if you’re looking to elevate your aurora photography game and capture the magic of the night sky in all its glory, upgrading to the latest iPhone model may be well worth the investment.
9. Share Your Spectacular Shots
Once you’ve captured the Northern Lights on your iPhone and edited your photos, share them with the world! Share your images on social media or consider creating a blog or photography portfolio to showcase your aurora adventures.
Your iPhone can be a powerful tool for capturing the mesmerising beauty of the Northern Lights. With careful planning, the right settings, and a little patience, you can create stunning aurora photography that will leave your friends and followers in awe of your celestial photography skills. So, embrace the challenge, head to those dark, Northern skies, and let your iPhone help you capture the magic of the Northern Lights.
